
What is metal surface spray coating?
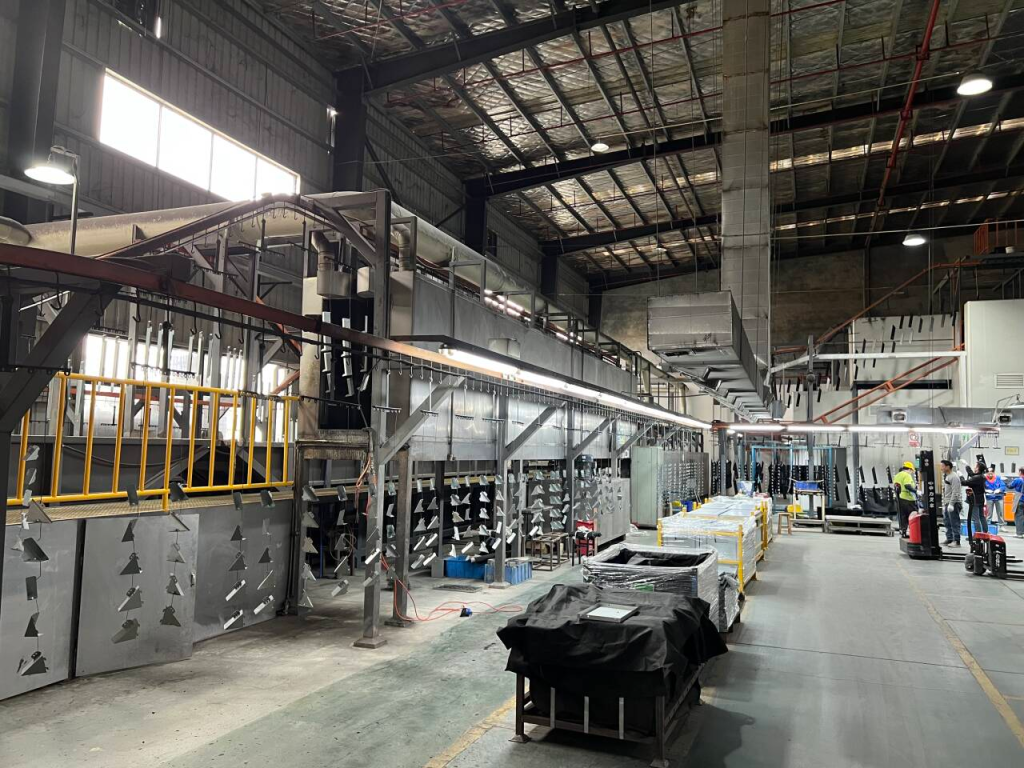
Metal surface spray coating refers to the process where, after sheet-metal parts finish forming operations such as cutting/blanking, bending, and welding, liquid or powder coatings are atomized and evenly deposited onto the metal surface using spray equipment. The coating is then dried or cured to form a protective layer. The main purposes are corrosion/rust protection, appearance improvement, enhanced wear resistance, and special functions such as electrical insulation—significantly extending product service life while improving the overall finish and perceived quality.
Why does your product need professional coating? 3 core values
1) Long-term reliability
We all know product lifetime directly affects user satisfaction and brand reputation. Professional coating is one of the most effective ways to improve durability. It’s like putting a tailored “protective armor” on metal: it blocks moisture, oxygen, and corrosive agents, while resisting abrasion and impact during daily use. Compared with ordinary coating, a professional process typically forms a denser film with stronger adhesion, helping products maintain stable performance under outdoor exposure, chemical environments, or high-frequency use. It’s not just about longer life—it also reduces maintenance and total use cost, improving overall value.
2) Consistent appearance across batches
In mass production, appearance consistency is a major quality signal. Professional coating relies on standardized procedures, precise color management, and strict QC to keep the look highly consistent—from the first piece to large-scale output. This consistency is not only a symbol of quality, but also a reflection of brand professionalism: it builds user trust and creates a clear, stable market perception of your product.
3) Lower delivery and quality risk
Inexperienced coating teams often “adjust while doing,” then rework after problems appear—wasting time and cost. A professional coating team reduces delivery and quality risk through optimized workflows, stronger quality control, and a more complete support system. For manufacturers, this means higher pass rate, smoother project delivery to plan, and reduced rework and communication cost.
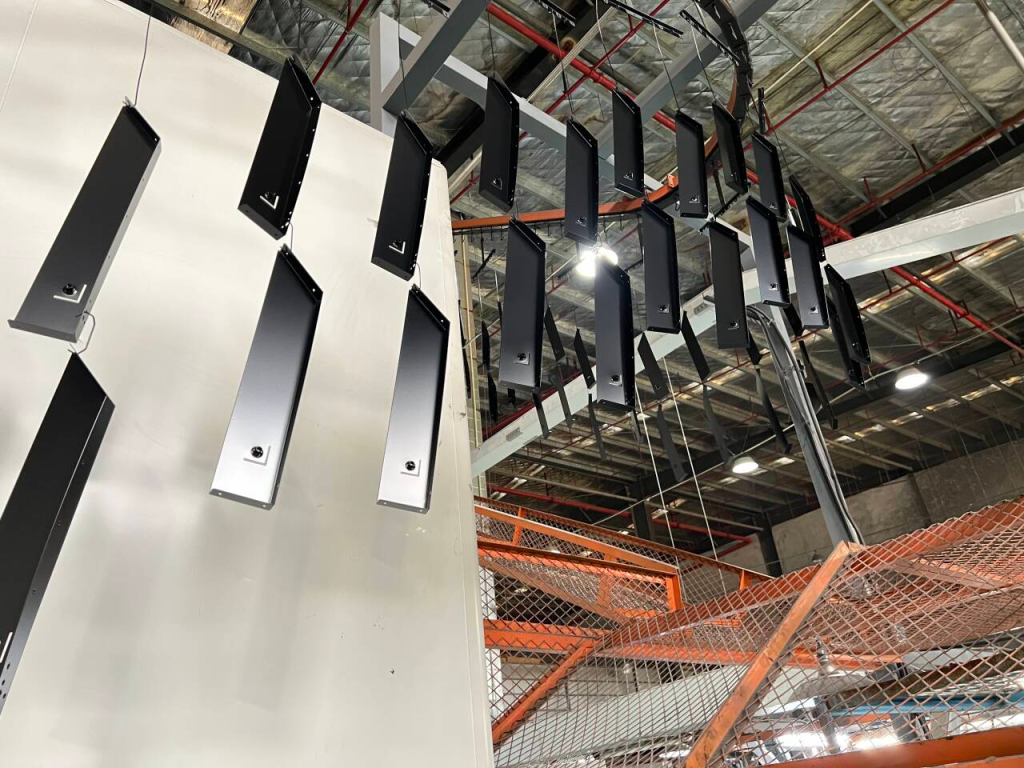
Common metal substrate pretreatment: the most overlooked key step
People often say “30% coating, 70% pretreatment”—because pretreatment determines whether the coating can truly “stick” and “last,” and it’s also the step where batch consistency most easily loses control. The goal is to remove contaminants, standardize surface condition, and build the adhesion foundation. If pretreatment is weak, issues like blistering, peeling, early rust, appearance fluctuation, and batch inconsistency become much more likely. When pretreatment is solid, durability, appearance consistency, and delivery stability become far more controllable. Pretreatment is the “hard work” that doesn’t look flashy, but data shows standardized pretreatment can extend coating life by 2–3×. Remember: pretreatment is a core process—skipping it is like building on sand.
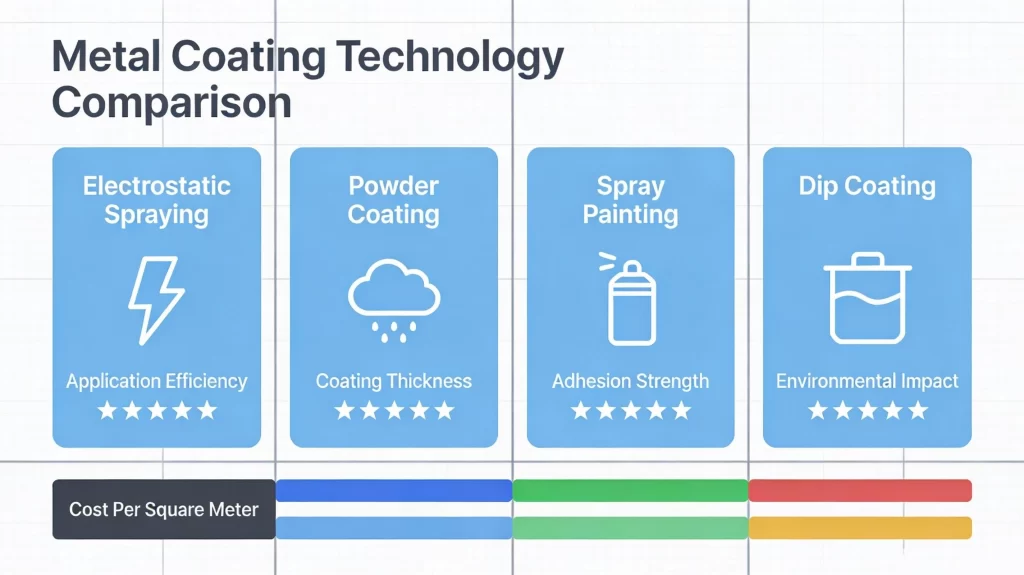
Comparison of mainstream coating technologies: matching geometry and volume to reduce rework risk
| Technology | Geometry suitability | Volume suitability | Rework rate | Key strengths | Main drawbacks | Typical applications |
| Liquid spray coating | Excellent (complex / irregular / internal cavities) | Small–mid volume (<5,000 pcs) | Medium (10–15%) | Fine appearance, strong penetration, flexible color change | Highly affected by temperature/humidity; harder to control batch consistency | High-end instruments, decorative parts, multi-color customization |
| Powder coating | Fair (simple / flat / open structures) | Large volume (>10,000 pcs) | Low (<3%) | Wear/corrosion resistant, low cost, eco-friendly | Harder masking on complex structures; color change/cleaning is cumbersome | Doors/windows, cabinets, hardware fittings, standardized products |
| E-coat (electrophoretic coating) | Excellent (complex / cavities / weld seams) | Very large volume (>50,000 pcs) | Very low (1–2%) | Uniform film, strong penetration, high stability | High investment, complex maintenance; long color changeover | Auto bodies, appliance housings, fixed production lines |
| UV spray coating | Average (simple 3D / flat) | Small–mid volume (<5,000 pcs) | Medium (5–8%) | Extremely fast curing, high efficiency, local repair possible | Expensive equipment; substrate requirements; uneven curing on complex geometry | Small parts, flat parts, electronics housings |
Quick recommendations
- Complex geometry + small volume: Liquid spray (highest flexibility)
- Complex geometry + large volume: E-coat (lowest rework risk)
- Simple geometry + large volume: Powder coating (best cost efficiency)
- Simple geometry + small volume: UV coating (fastest throughput)
Rework tends to be high not because you “chose the wrong process,” but because key control points weren’t moved forward: pretreatment + consistent surface condition determines adhesion and corrosion-resistance “foundation”; film-thickness window + masking strategy determines assembly/function control (“dimensions”); fixture/rack points/accessibility design determines coverage in dead corners, edge protection, and batch consistency (“details”). Once these three are clearly defined, process stability can truly hold up in volume production.
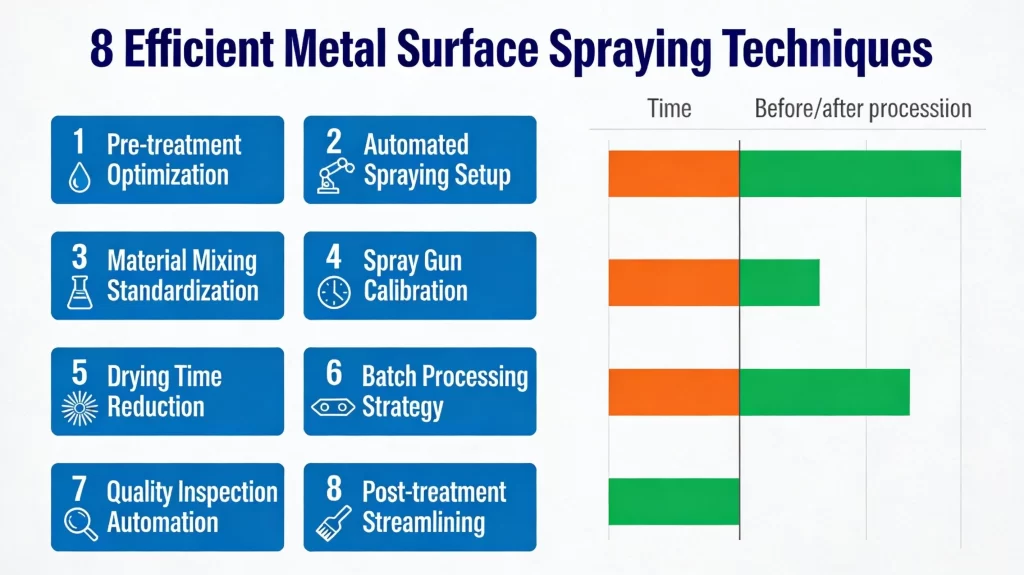
How to prototype both fast and steadily? 8 time-saving process tips from experts
Prototyping is manufacturing’s “lightning war”—you need speed to seize timing, and stability to ensure quality. But in reality, 90% of prototyping projects bounce between “fast” and “stable”: go fast and quality slips; go stable and the schedule drags. Below are 8 proven, time-saving practices our experts repeatedly validated in sheet-metal prototyping—ideal for teams that need quick structural validation without pushing risk downstream.
1) Run a quick DFM review first: surface high-risk points early
Do a DFM quick check before starting work. Many rework issues are visible on drawings: bend interference, insufficient hole-to-bend distance, weld distortion risk, coating dead corners, assembly datum surfaces affected by coating, etc. Spending time to flag these early often saves more time than running extra prototype loops later.
2) Classify critical dimensions: function first, relax non-critical
Manage dimensions by layers. Prototypes fail when everything is treated as critical—inspection, rework, and confirmation all become heavy. A better approach: explicitly mark functional dimensions (hole-pattern chains, locating faces, sealing points, conductive/grounding points) as priority items, while keeping appearance/non-functional dimensions under general tolerances. Both machining and inspection become much faster.
3) Lock material information: grade/temper/thickness tolerance in one shot
Don’t stop at broad categories like aluminum/stainless/CRS—what really affects springback, weld distortion, and coating appearance is the exact grade, temper/condition, and surface state. Writing grade, thickness tolerance, and surface condition clearly in prototyping reduces the chance of “we built it and only then discovered it’s wrong.”
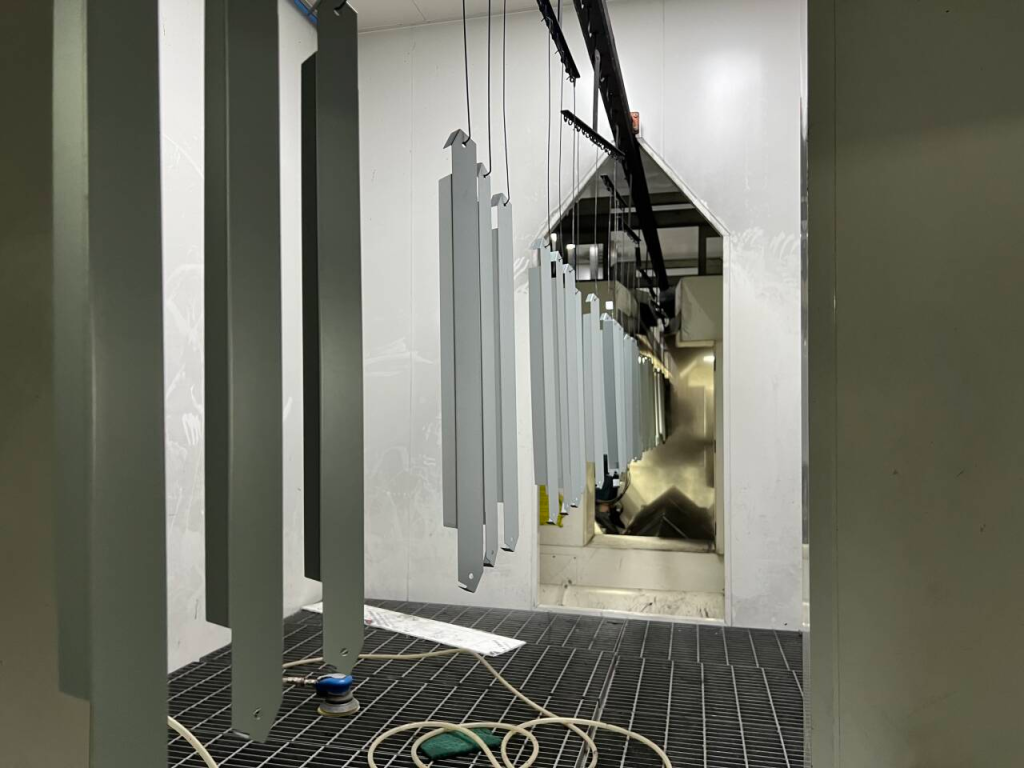
4) Define coating targets first: color/gloss/film thickness/masking up front
Coating rework is often not because the process “can’t be done,” but because the acceptance target isn’t defined. Lock in the color system (code or sample), gloss, texture, appearance grade, acceptable film-thickness window, and which areas must be masked (threaded holes, grounding points, assembly datum faces). You’ll find many “quality issues” are actually “undefined standards.”
5) Prefer mature process routes: stabilize first, then refine
In prototyping, prioritize mature routes. The tighter the schedule, the less suitable it is to start with non-standard complex flows. Use conventional bend radii, stable welding combinations, and proven coating systems—put “repeatable stability” first. Special requirements can be upgraded step-by-step after the sample passes.
6) Design fixtures & locating early: prototype with batch repeatability in mind
Don’t wait until mass production to think about fixtures and locating. Many samples can be made, but batch output “drifts” because rack points, locating, and clamping methods weren’t designed for repeatability from day one. Define datums, rack points, and accessibility during prototyping so the path to volume production doesn’t require a reset.
7) Push workflows in parallel: material/process/inspection/coating scheduled together
Make the flow parallel, not serial. Prototype delays usually aren’t machining speed—they’re waiting for materials, confirmations, coating slots, or inspection安排. Once engineering review passes, advance material prep, process planning, inspection, and coating scheduling simultaneously. Reduce “waiting,” and lead time naturally drops.
8) Standardize first-article sign-off: define appearance boundaries with samples/photos
First-article approval must be based on “signed sample standards,” especially for appearance. Color difference, particles, orange peel, and runs are the most common sources of endless back-and-forth. Instead of verbal descriptions every time, define acceptable boundaries using sample boards or photos. Align once at first article, and you won’t keep pulling back and forth later.
How to verify whether coating meets spec?
The two lines we fear most: “This color seems slightly off,” and “The customer says the paint peels with a touch.” Without a unified verification standard, everything becomes subjective. Here’s a quick coating verification checklist we commonly use—arguments drop dramatically.
Appearance consistency verification
Appearance is the most direct visual output. Start with color difference: measure with a colorimeter; check texture defects under backlight to quickly judge issues; check cleanliness using white gloves to spot dust/oil; masking areas must be clean with no coating; edge coverage must prevent both “missed spray exposing substrate” and “buildup causing interference.” Also, build and archive an “appearance limit sample set,” so disputes can be resolved by direct comparison.
Performance verification
Appearance is only the pass line—adhesion and film thickness decide whether you can ship. Use cross-hatch (grid) adhesion testing to quickly identify the root cause of “peels on contact.” Measure film thickness with a gauge at typical positions (flat surfaces, edges, recesses) to confirm it falls within the target window. When needed, add hardness and corrosion resistance tests (e.g., salt spray / immersion) to validate service-life expectations. During prototyping, adhesion + thickness must be tested; in mass production, first-article inspection is mandatory plus patrol sampling—push performance risk to the front.
Dimensional / assembly verification
A coating can look great but still be unusable if it won’t assemble. Key hole distances, locating faces, and mating clearances must be checked against drawing tolerances and evaluated together with coating thickness to see whether interference will occur. Don’t rely on “feel”—use mating parts for real assembly verification. For conductive/grounding areas, clearly define regions that “must expose bare metal” and verify resistance as required. In prototyping, it’s recommended to do multiple sets of real-fit checks; in mass production, first-article real fit plus patrol sampling can significantly reduce post-delivery rework.
Process parameter monitoring
If you want stable mass production, you can’t only stare at finished goods. Pretreatment (degreasing, conversion coating) determines the adhesion foundation; spray parameters (voltage / air pressure / flow rate) affect appearance and thickness; curing conditions (temperature / time / line speed) determine coating hardness and durability; environment (temperature/humidity/cleanliness) affects the probability of particles, whitening, and runs. Set patrol frequency and alarm thresholds, and correct deviations in time.
Controlled document check
Traceability is what makes “meeting spec” real. The first article should be sealed and archived with photos/samples and signed confirmation; work instructions and parameter sheets should be issued with operator sign-off; appearance limit samples and functional test specs should be clear so inspectors know how to judge. All documents must be controlled (version number, date, signatures). If documents are out of control, quality will be out of control. With document control done well, inspection can make decisions, production can execute, and delivery rhythm won’t be slowed by repeated confirmations.

Quick solutions to common questions (FAQ)
Q1: In a 48-hour coated prototype, what part fails most often?
A: Standards aren’t set: no signed sample/limit samples, unclear pretreatment and masking, and no evaluation of rack-point accessibility. If you want 48 hours to be stable, freeze three things first—information / process / acceptance—then start.
Q2: What must be verified in prototyping? What 2–3 items save the most time in mass production?
A: Prototype: appearance vs signed sample + adhesion + thickness + real assembly fit. Mass production: appearance vs signed sample, thickness sampling, functional-area masking + real fit (must do on first article).
Q3: If coating blisters/peels, what should be checked first?
A: Check pretreatment and curing first, then run cross-hatch (grid) adhesion validation. Correct or rework based on results to prevent recurrence.
Q4: If thickness causes assembly interference, what should you do?
A: Set a thickness window + must-measure points, move masking rules forward for threaded holes/grounding faces/locating faces, and confirm with real assembly on the first article.
Q5: The color “looks close,” but the customer still says it’s wrong—how to close it fast?
A: Compare under a unified light source against the signed sample, archive appearance limit samples/photos, and use one unified standard to accept batch output.
Q6: How do you reduce rework?
A: Move control points forward: make pretreatment, thickness/masking, and fixture/rack-point design solid during prototyping. High rework is rarely “a process problem”—it’s usually that control points weren’t moved forward.